Solution with Five Easy Steps when your AMD Catalyst Control Center cannot be started.
Is
this screen which you’re experiencing?

Time
to say Goodbye to the this screen! And Hello to Switchable Graphics in this
solution with five easy steps!
This
worked for me as a solution on my notebook as a solution for the AMD Catalyst Control
Center,
and this could work for you as well.
Have
you had the following experience on your notebook with switchable graphics?
- AMD Catalyst Control Center cannot be started. There are currently no settings that can be configured using the Catalyst Control Center.
- Trying to configure Catalyst Control Center to currently no avail.
Needed (What you’re
going to need):
Note: This is only for notebooks which have
switchable graphics.
a. System
Restore Point.
b. Internet
Connectivity.
c. Cleaning
Utility (such as CCleaner) – Go here if you need the software.
d. Administrative
rights/privileges; for when you run the setup.
-
If
you are on the move, you can either bookmark this page or if you can’t view the
images for some reason, then this link is your friend to
get a copy.
The Five-Step Solution:
First: Create
a System Restore Point.
Now
that you have created the System Restore
Point; here is what you do:
2. Uninstall: Completely Uninstall AMD Control Center in the Control Panel and then from your Registry {this is where you need software like CCleaner.}
2.1
Go
to your ‘Control Panel’ and now
click on ‘Program and Features’ (Control Panel\All Control Panel
Items\Programs and Features)

2.2
Look
for ‘AMD Catalyst Install Manager’,
also known as the AMD Catalyst Center and
then click on it.
2.3
After
you have clicked on ‘AMD Catalyst
Install Manager’, you are taken to a window that looks like this:

2.4
Click
on ‘Next’
2.5 Now you have some options select ‘Express Uninstall ALL AMD Software’.

2.6
Click
‘Next’ again after you’ve made the
selection.
2 7
After the uninstaller has completed, open up your cleaning utility (CCleaner
in my case.)
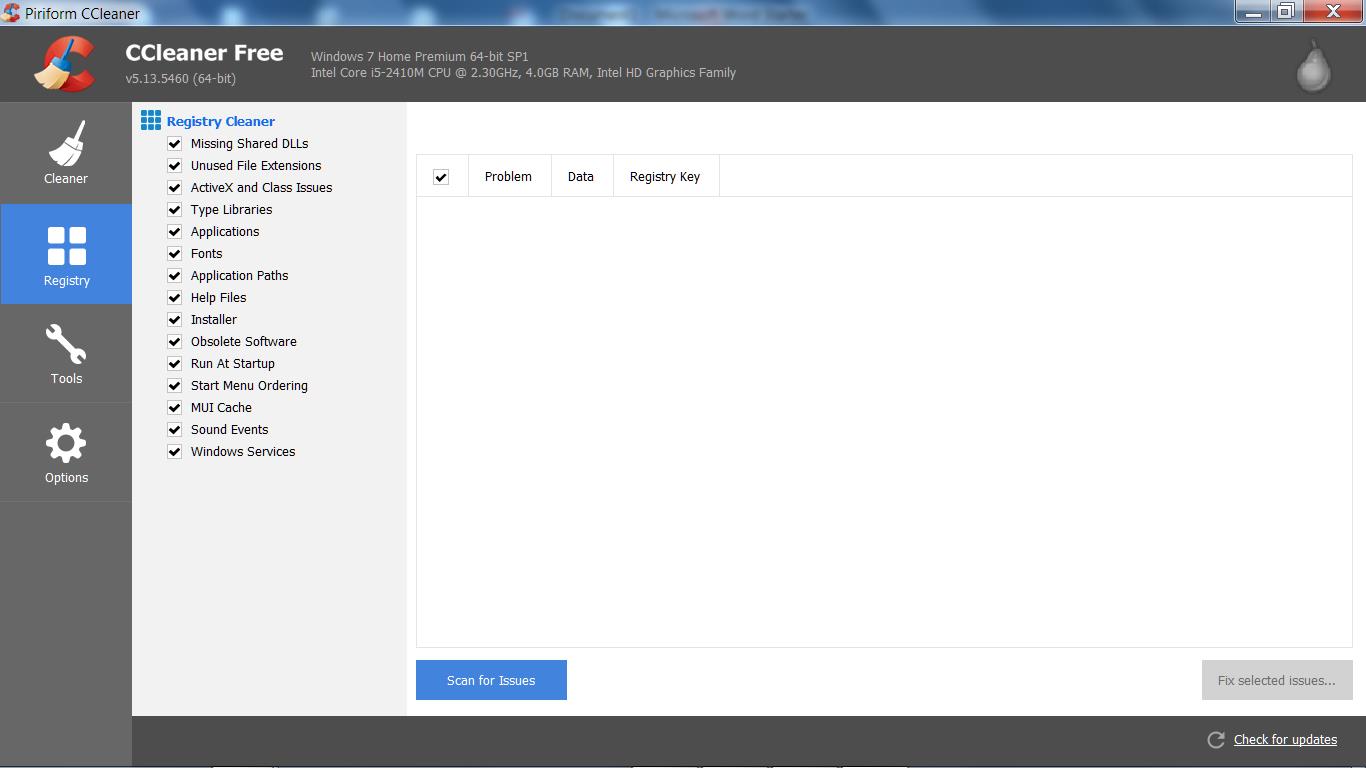
2.8
Select
the ‘Registry’ Tab (Make sure that
everything is checked.)
2.9 Now click on ‘Scan for Issues’.
2.9.a) After the scan is completed, play particular attention to ‘AMD errors’ and then select the Fix Button (which should be a removal). There is another screen after
this, which you prompts you to create save a copy of the register before you
make changes generally I always save the change, it is entirely up to you.
2.10. We are nearly there: now restart your Notebook.
3. Download: The AMD Drivers Graphics from your Notebook Manufacturers’ site.
3.a. Go to your notebook manufacturer’s site:
-
I’ve
an HP notebook (so I went to http://support.hp.com/us-en/drivers/)
-
Or
search (Your Notebook Manufacturer
Name) drivers just be sure to remove the brackets from the
search.
Note
for HP Users:
You need to get and use your HP Product Number. To do this you press
the fn + esc keys, then an HP System
Information Tab would pop-up, and after-which look for your Product Number.
3.b. After you got and entered
on your Product Number (as the case may be) – Look for the ‘Driver Graphics’ menu/tab/field.
3.c. Download the respective AMD
Package for your notebook.
4. Installing AMD Catalyst Control Center: Select “Custom Install”
i.
Go
to the respective downloaded location of the AMD Catalyst Control and Run the ‘Setup’ which you have just downloaded.
ii.
Then
select ‘Custom Install’ then ‘Next’

iii.
Then
you will go to the ‘Analyze Screen’

iv.
Make
sure that all of the boxes are checked
on the ‘Customize Screen’

v.
Then
click on ‘Next’, and then wait for
the install to be completed. As you can
see from the above I have already installed the AMD Catalyst Control Center.
vi.
After
the installer has completed, restart your notebook.
5. Updating: Intel Driver.
i.
Go
‘My Computer’
ii.
Then
‘System Properties’ (Control Panel\All Control Panel Items\System)
iii.
On
the left-side you would see the ‘Device
Manager’
iv.
Open
the ‘Device Manager’.

v.
Select
‘Display Adapters’: you should see
two listed\

vi.
Right-click
on the ‘Intel HD Graphics Family’
and then select ‘Update Driver Software’

vii.
This
takes some time, and after this has completed.
viii.
Restart
your notebook.
SUCCESSFULLY LAUNCHING
THE AMD CATALYST CENTER:

SUCCESSFULLY LAUNCHING
THE AMD CATALYST CENTER WITH SWITCHABLE GRAPHICS:

The
images which contain the name, design, features and/or functionalities in the
above is the property off and trademarked to the respective brand, entity, company and/or
organization;
AMD:
Installer, Catalyst Control Center.
Piriform:
CCleaner.
Windows:
Programs and Features, Device Manager.
Intel:
Intel HD Graphics.
Welcome
back to the high-performance mode and more importantly enjoy!
Salute
Kash
Kash.KXG
"Aspire to Inspire
Live to Dream
Envisioning the Vision and the Opportunities."
"Aspire to Inspire
Live to Dream
Envisioning the Vision and the Opportunities."
No comments:
Post a Comment